This week we decided to explore an asymmetric networked multiplayer game with a horror theme. I enjoy playing competitive games and have experience making asymmetric multiplayer games with pew. Ryan and I were both on that team so we are slightly hesitant towards this idea because it is close to something we had already done before but at the same time it could still be different enough to be fun to make. In the prototype I made you can switch between both sides of controlling a giant spider and controlling a human. In the full game there would be multiple humans fighting against a giant spider player.
This is a screen shot of the giant spider laying an egg sack. Egg sacks spawn a smaller spider every ten seconds. The only mechanic currently worked out for this character is to lay these egg sacks. We have other ideas such as setting up webs as traps but those are not fully thought out yet.
This is a screenshot of the human fighting off the horde of spiders that the giant spider just created. It is night time for this player so he has a lantern. He also has a gun with limited ammo at the moment.
Though we had fun with the conception of this idea I think we are starting to lean away from asymmetric multiplayer. One of the major issues with this idea is that it would rely heavily on the spider player knowing what he is doing for the game to play correctly. In the setting that this would be played the most, the QA labs, the players will be new to the game. It may take 3 games or so for the spider player to get it and during that time the other players aren't enjoying or truly testing the game. And by that time he will have to switch to a different game or role. Because of this and a few other reasons we have decided to take the game as a multiplayer coop against spider AI that I will get more into next week.
This week we decided to further explore Magnetx. The two main things I added to the prototype is having the magnet powers lock onto magnetized objects and adding basic blocks to push and pull.
This is a very simple mechanic of being able to pull and push blocks within the environment. This would later be used to solve puzzles.
The way this locking on mechanic works by using what we had before and adding a lock on target effect. Once you hit a magnetized object the magnetized rays point towards the point that they hit regardless of where the player goes. This gives sort of a grappling feel.
This grappling feel was definitely very fun and could work in our platform puzzle environment but the problem is that it starts go away from the realism of magnetization. Mechanics such as this could be fun in a platform puzzle but don't represent how magnets really work. So we have to ask ourselves if we were interested in the mechanics or the realism of magnets.
This week my team decided to explore a co-op stealth game. The setting of this game takes place in a 1950's house. The main characters are two kids that are trying to sneak cookies without their parents knowing. This week I made a basic game play prototype to show off the kind of mechanics we would have in our game.
An interesting part of what I did this week was my detection implementation. The initial goal was to create an accurate cone of vision for the parent. I decided that an easy way to do detection that would not see through walls would be to use Unity's line-cast or ray-cast systems. So I created an object that would take a start point, an angle, and a distance for line casting. It also had a line render attached to it so that the detection could be displayed. From here I wrote a generator script that took in an angle range and a transform and then created these line renders around the given transform. In the picture above I have a parent with a range from 0-70 degrees creating a cone like shape of vision.
In this second picture the kid is in range of the parent but is not detected because the line-cast does not go past other objects.
The first game we're looking into doing for senior team is a game called Magnetix. In this game you play as an electromagnet in a puzzle platform environment. We have ideas of exploring magnets and different things that magnets can do too add to the fun of this puzzle game.
For this first week though I created a prototype that shows off the base mechanic. This prototype has attracting and repulsing abilities for the player. In order to do this I first had arms that rotate around a single axis. From here the player could left/right click and shoot out attraction/repulsion lines in the direction the arms are facing. This was done by simply adding force relative to the direction the arms are facing.
As you can see in the image above the attraction lines can be used to move the player towards objects. This can be useful to get to higher platforms.
The other option is to use repulsion. In the image above it is used on an object directly below the player to shoot him strait up. This could be used to get over areas that maybe have traps in a pit but there is a magnetized area to push off of.
Overall this prototype was successful in showing that these sort of physics can be fun. As soon as you jump in and play around it is kinda fun, even though there isn't much of a game yet. Based on that reaction alone it seams this game could have some good potential.
This is a game I developed for my production 2 course with Matt Struble, Matt Therrien, Matt Cerasoli, Ryan Atkinson, John Cotto and Dan Thomas. Pew is a networked multiplier game. There are three teams, an ogre team and two archer teams. The objective of the game is to be the last team standing.
Matt Struble and I were the programmers on this project. In general we liked to work together in the labs, so we often had our hands in the same parts of the projects. There were a few things that got more separated towards the end such as I did more of the level/weapon select, loading, arrow homing, and UI/HUD elements while he worked more on the ogre weapon attacks, animations, and power ups.
One of the more challenging aspects of this game was to get the arrows to look good over the network. Initially we implemented prediction and smoothing techniques for the arrows. This made the arrows look like they hit when they hit more but caused the arrows to curve in unexpected ways. At the same time we were having a design issue where an archer on archer fight would go on for too long without any hits. In order to solve both of these problems we decided to add arrow homing to give a reason for arrows to curve and make hitting enemies easier.
In this project we tackled a challenge of creating a networked game, with three teams and asynchronous multiplier. Given how little experience the programmers had with unity at the start of the project, it did seam that this might be a bit of a stretch. In the end the game came out pretty good. There are still some bugs though that it would have been nice to have more time to polish out. We ended up still adding important things even in the last week that gave us little time to make sure that everything new ran smoothly. Even still this game was a great accomplishment.
This was my final project for Game AI. I was on a team of three programmers consisting of Evan Schipellite, Paul Kubik, and myself. We decided to try and create a flashlight game with networking, sharers and AI for players and ghost for this 5 week project. We decided to use C# with XNA because we had already learned how to do networking in XNA for our game networking course. For this project I primarily worked on the level editor, the flash light effect, and the AI for the player.
For the flashlight I created a triangular light in front of the player that gets darker based on the distance from the player. I looked at this source to create the triangle effect and this guide to create the differed lighting effect. I also wrote a simple blender that uses the brightest light between all the players flash lights. This way there is not a darker spot in the middle of your flashlight from another player. I wanted to go further than this by making the flashlight stop at walls. I had several ideas on how to approach it but due to time constraints I decided that it was better to start focusing on the AI.
In this video I have the player (Jake) controlled by the AI to show off the player AI. The player AI has 4 states searching a room, opening an object, avoiding a ghost, and moving to a room.
In the searching a room state the player moves randomly around a the room. There is a set amount of time that a player searches a room. When this time runs out he will go to the move to room state. This works generally well but for smaller rooms it does not look right. It would be better if we scaled it based on the room size. While he is searching the room if he finds an object he will go to the open object state, and if he sees a ghost he will go to the avoid ghost state.
In the open object state the player moves to the object that he saw, rotates towards the center of the object, and opens it. If during this time he sees a ghost he will go to the avoid ghost state. Otherwise, he will return to the searching room state after he finds the object.
In the move to room state the player moves to a random adjacent room that the player hasn't been in yet. This way the player doesn't constantly search the same room. The player changes to the search room state when he gets to his desired room. If he spots a ghost on the way, however, he changes to the avoid ghost state.
In the avoid ghost state the player will choose a random adjacent room to move to. This is not the best thing because it can cause the player to run into the ghost instead of run away but given the time constraints this is what we decided to do. The player changes to the searching state after arriving in the randomly chosen room.
If we had more time some of the things we would have liked to improve is some of the AI for both the player and the ghost as well as making the flashlight not go past walls. In the avoid ghost state it would be better if the player choose a path that would avoid the ghost as well as leave the room. Currently the ghost can see players through walls. It would be worth limiting the ghost to only seeing what is within the room that they are in. Given that this was a 5 week project the overall scope for a networked game with AI was a bit ambitious. Considering the time period we are happy with what we were able to get done and enjoyed exploring how AI, networking and sharers work in a game together.
In Game AI we were assigned a final project to create a game with state machine based AI. My group decided to make a networked collection game in a haunted mansion. In order to setup levels easily I created this level editor. I decided to iterate on the level editor that I created for our Hierarchical Pathfinding Tech Demo.
The first tab is used to add walls and paint the rooms. All you have to do is import a tile strip and it will separate the tiles for you. Then just click on a tile to select it and left click on the editor screen to paint that tile.
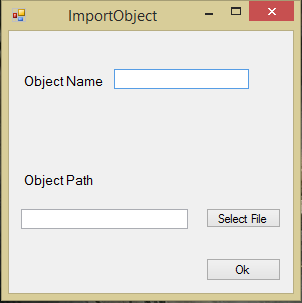
The next tab is used to add and manipulate objects. To import new objects the user simply opens the import object window, selects a .png and give it a name. Similar to the add walls you can select and object on the right and place it in the editor. However, when adding objects if the user holds down the mouse the user can move the objects around. The user can remove objects by right clicking on them. The user can change the rotation of an object or its search weight by clicking the middle mouse button on and object, which opens the edit object window. In order to easily add collisions to the objects and prevent more than one object being place on the same tile, I save where objects are in a 2D int array. When placing an object I check to see if there is one an object on any of tiles the object would be on. This prevents any overlapping issues. When saving the game I add the object array to the collision array, so in game the player can't collide with objects.
In our Flashlight game the AI for both the player and ghost utilize rooms to define a search area. This tab is used to setup the rooms. When you select a room all of the room tiles and connection lines are highlighted while the tiles and connections for the other rooms are alpha-ed out. The ability to use alpha so easily is given to us because the editor window is using XNA. The user controls are pretty similar to other tabs, click the room on the right to select it, left click to paint rooms and right click to delete. The user can also change the name of the rooms in the text box in the top of the right side. The connections are created automatically by checking if any adjacent tiles are in another room.
Ghost are the enemy in our Flashlight Game. This section allows the user to place new ghost spawn points, ghost free zones and set up information about the ghost AI. If you middle click on a ghost spawn point it brings up an edit ghost info window that allows you to manipulate how the AI works for that particular ghost. Similar to how it works in add walls the user can draw ghost free zones that ghost can't travel into. This is so the ghost won't be too close to where the players start and reset. There are also options to setup the transitions for each of the ghost states.
The player section is used to setup the player start positions and add transitions for each player state. To place a player start position the user simply selects a player on the right and left clicks. To change transitions the user can click the transition buttons on the right to open up a window for that state.
Though this level editor isn't completely bug free I am happy that I was able to make a working version in a about two weeks. I had to make it robust enough so that my other team member Evan Schipellite could use it to design the level. It worked well for us and allowed us to create an interesting level for our game.