Friday, March 7, 2014

Flashlight Game


This was my final project for Game AI. I was on a team of three programmers consisting of Evan Schipellite, Paul Kubik, and myself. We decided to try and create a flashlight game with networking, sharers and AI for players and ghost for this 5 week project. We decided to use C# with XNA because we had already learned how to do networking in XNA for our game networking course.  For this project I primarily worked on the level editor, the flash light effect, and the AI for the player.


For the flashlight I created a triangular light in front of the player that gets darker based on the distance from the player. I looked at this source to create the triangle effect and this guide to create the differed lighting effect. I also wrote a simple blender that uses the brightest light between all the players flash lights. This way there is not a darker spot in the middle of your flashlight from another player. I wanted to go further than this by making the flashlight stop at walls. I had several ideas on how to approach it but due to time constraints I decided that it was better to start focusing on the AI.


In this video I have the player (Jake) controlled by the AI to show off the player AI. The player AI has 4 states searching a room, opening an object, avoiding a ghost, and moving to a room.

In the searching a room state the player moves randomly around a the room. There is a set amount of time that a player searches a room. When this time runs out he will go to the move to room state. This works generally well but for smaller rooms it does not look right. It would be better if we scaled it based on the room size. While he is searching the room if he finds an object he will go to the open object state, and if he sees a ghost he will go to the avoid ghost state.

In the open object state the player moves to the object that he saw, rotates towards the center of the object, and opens it. If during this time he sees a ghost he will go to the avoid ghost state. Otherwise, he will return to the searching room state after he finds the object.

In the move to room state the player moves to a random adjacent room that the player hasn't been in yet. This way the player doesn't constantly search the same room. The player changes to the search room state when he gets to his desired room. If he spots a ghost on the way, however, he changes to the avoid ghost state.

In the avoid ghost state the player will choose a random adjacent room to move to. This is not the best thing because it can cause the player to run into the ghost instead of run away but given the time constraints this is what we decided to do. The player changes to the searching state after arriving in the randomly chosen room.

If we had more time some of the things we would have liked to improve is some of the AI for both the player and the ghost as well as making the flashlight not go past walls. In the avoid ghost state it would be better if the player choose a path that would avoid the ghost as well as leave the room. Currently the ghost can see players through walls. It would be worth limiting the ghost to only seeing what is within the room that they are in. Given that this was a 5 week project the overall scope for a networked game with AI was a bit ambitious. Considering the time period we are happy with what we were able to get done and enjoyed exploring how AI, networking and sharers work in a game together.

Flashlight Game Download

Flashlight Game Level Editor

In Game AI we were assigned a final project to create a game with state machine based AI. My group decided to make a networked collection game in a haunted mansion. In order to setup levels easily I created this level editor. I decided to iterate on the level editor that I created for our Hierarchical Pathfinding Tech Demo.


The first tab is used to add walls and paint the rooms. All you have to do is import a tile strip and it will separate the tiles for you. Then just click on a tile to select it and left click on the editor screen to paint that tile.


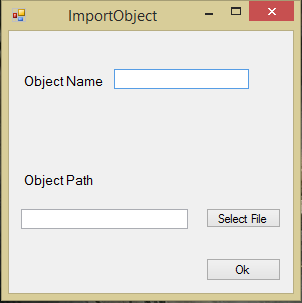
The next tab is used to add and manipulate objects. To import new objects the user simply opens the import object window, selects a .png and give it a name. Similar to the add walls you can select and object on the right and place it in the editor. However, when adding objects if the user holds down the mouse the user can move the objects around. The user can remove objects by right clicking on them. The user can change the rotation of an object or its search weight by clicking the middle mouse button on and object, which opens the edit object window. In order to easily add collisions to the objects and prevent more than one object being place on the same tile, I save where objects are in a 2D int array. When placing an object I check to see if there is one an object on any of tiles the object would be on. This prevents any overlapping issues. When saving the game I add the object array to the collision array, so in game the player can't collide with objects.


In our Flashlight game the AI for both the player and ghost utilize rooms to define a search area. This tab is used to setup the rooms. When you select a room all of the room tiles and connection lines are highlighted while the tiles and connections for the other rooms are alpha-ed out. The ability to use alpha so easily is given to us because the editor window is using XNA. The user controls are pretty similar to other tabs, click the room on the right to select it, left click to paint rooms and right click to delete. The user can also change the name of the rooms in the text box in the top of the right side. The connections are created automatically by checking if any adjacent tiles are in another room.


Ghost are the enemy in our Flashlight Game. This section allows the user to place new ghost spawn points, ghost free zones and set up information about the ghost AI. If you middle click on a ghost spawn point it brings up an edit ghost info window that allows you to manipulate how the AI works for that particular ghost. Similar to how it works in add walls the user can draw ghost free zones that ghost can't travel into. This is so the ghost won't be too close to where the players start and reset. There are also options to setup the transitions for each of the ghost states.


The player section is used to setup the player start positions and add transitions for each player state. To place a player start position the user simply selects a player on the right and left clicks. To change transitions the user can click the transition buttons on the right to open up a window for that state.


Though this level editor isn't completely bug free I am happy that I was able to make a working version in a about two weeks. I had to make it robust enough so that my other team member Evan Schipellite could use it to design the level. It worked well for us and allowed us to create an interesting level for our game.